REAR SHEETMETAL PANELS
The first part of the puzzle was installing the wheel tubs. Once installed, everything was built around them. Dave trimmed some of Big Red’s original ’69 Camaro package tray area to make the fabrication of new panels easier. The crew again used cardboard to create templates. Once the design process was finished, Dave transferred the templates to 0.50” aluminum.
The rebuild included the relocation of the oil hoses (see the holes above the driver’s side wheel tub) and fuel hoses (in matching holes on the passenger side), additional cage bars, better-sealing side panels, rear panels, and wheel tubs. The existing steel interior panels were the ones installed by Bill Osborne in 1988, and they have served the car well. Some were sealed with black racing tape in an attempt to keep dust out of the cockpit at El Mirage. Door bar changes made to the cage in 2006 inadvertently locked the aluminum side interior panels in place so they couldn’t be removed without major surgery. It was time to remove all of them and start from scratch.
The new lateral cage bars were added from the main hoop to the rear support bars to triangulate the rear of the chassis. Big Red was good without them,
but the chassis will be much more rigid with them. With the rear structure modifications, Dave worked his fabricating magic. The first part of the puzzle was installing the wheel tubs. Once installed, everything was built around them.
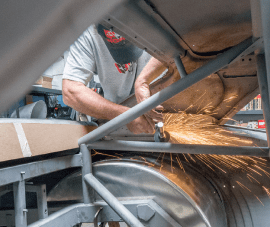
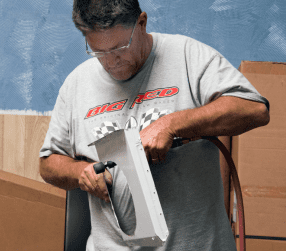
Dave used a large, dead-blow hammer and a large-diameter pipe as a dolly to form the side panels so they would fit the contours of the factory sheetmetal in the package-tray area. He also added a small access panel so the hoses in the rocker panel could be serviced without removing the entire panel and surrounding panels. Dave rolled strengthening beads in the large center panel due to its size. There’s more than meets the eye to build the rear interior panels. The long brackets mount on the front of the wheel tub and side panel, and the square panel mounts to them. During the process of building the panels, Dave and Mark had to test fit the fire system to make sure all the relief cuts and holes are in the panel prior to sending the pieces off to the powder coater. Mark cut and clearanced the dry-sump tank hole in the quarter panel lower closeout panel. All the panels were temporarily held in with quick-release Cleco clips so they could be removed for coating. After the panels were powdercoated, they were installed with steel rivets and 6/32-inch stainless fasteners for a semi-permanent installation.