PAINT
After the powdercoating was done, Big Red was shipped directly
to Rounsvilles Autobody in San Bernardino, California, for
painting. For eternity, Big Red’s go-to paint shop was Mike Face
Auto Body. Mike retired from the business and referred RJ to
Rounsvilles. The owner, Bret, had previously worked with Mike, so
he felt confident in his referral.
Moving Big Red from their trusted shop to a different one was
a scary thought, but Bret and his crew made the transition easy.
They had all the necessary equipment and expertise to get the job
done well. A big plus was their willingness to have the Big Red
film crew and photographers shadow them through the process.
PPG Refinish products were used for every part of the body work
and paint process, from clearcoat all the way down to the filler.
The body wasn’t perfect to start with in 1987. Over the years there have been a few mishaps on the track…that’s racing. Overall, the body has been kept in fairly good shape. There weren’t any typical first-gen Camaro rust issues to deal with, but like with any racing car, there were some imperfections to be repaired with a hammer and then addressed with filler.
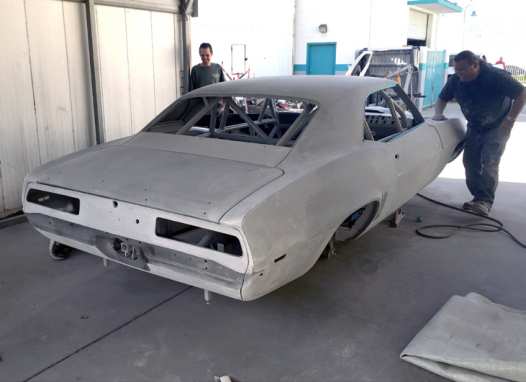
After Bob Calles, the painter, was done block sanding any high spots, all of the bolt-on parts were removed so they could prep the jambs. All of the body openings are taped from the inside, so the sealer, paint, and clearcoat can get a full bleed, all the way to the pinch welds. The chassis was taped off, too. Then it was time for Bob to mix PPG Envirobase High Performance A-Chromatic LV sealer primer using the suggested gray and black sealer colors for the correct shade to cover with basecoat. While Bob was working on Big Red’s body, some of the smaller parts were getting sprayed with filler primer to smooth out surface imperfections.
Over the previous 29 years, Big Red has been a few different shades of red. The previous red was great, but RJ wanted the color to pop a little more. There’s no better time than the complete rebuild to make a change. The color choice was a group decision. Two reds were chosen by the crew that were slightly more orange and brighter, and RJ made the final decision from there.
Some paint manufacturers create colors named after a famous car build or its builder. Team Big Red was fortunate enough to work closely with PPG, but didn’t get a color named after the car.
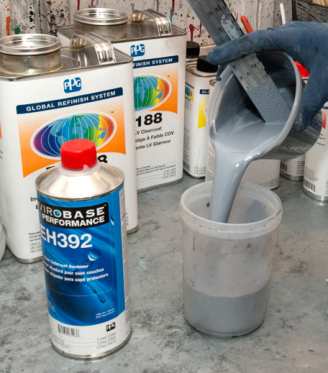
The chosen color was “Ultra Red. Bob stirred the PPG Envirobase HP and then poured it into a mixing cup to measure out the correct amount of reducer. First, he mixed a small amount to spray one of Big Red’s hoods. He was happy with the results, so he started mixing a larger batch to paint the whole body. Since Rounsvilles is working on more than one project at a time, Bob labeled the SATA gun cup with a marker. No mistaking that it’s Big Red’s paint!
Even though Bob has 35 years of experience painting — and he’s really good — there’s always the chance that the paint can be thin in some areas. In a paint booth, it’s tough to see thin basecoat with the naked eye. Bob and Ryan team up to inspect the first basecoat of red with a 3M™ PPS Sun Gun. It spotlights imperfections in the paint and shows areas with incomplete color coverage.
Doing this gives them the chance to fix any issues or address thin areas of coverage before continuing and spraying the clearcoat. Mike Rivera sands the filler primer on some of Big Red’s extra parts. Since Big Red’s paint isn’t metallic, the other body parts safely can be painted separately. All the bolt-on pieces (including extra hoods, trunk lids, rear spoilers, and doors) need to be processed soon. The pieces that will be striped will be needed prior to taking Big Red’s body back to the shop for assembly.
Brandon Wright performed fiberglass work on The Elephant hood with Evercoat Fiber Tech-reinforced repaircompound filler. He reinforced and bonded the rear corner of the hood where the structural framing and top layer of the hood had separated.
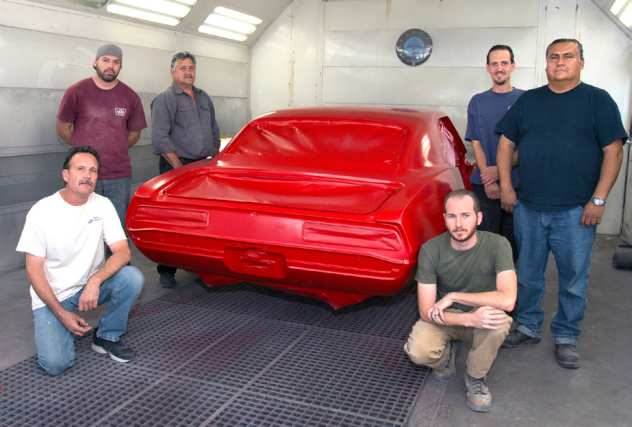
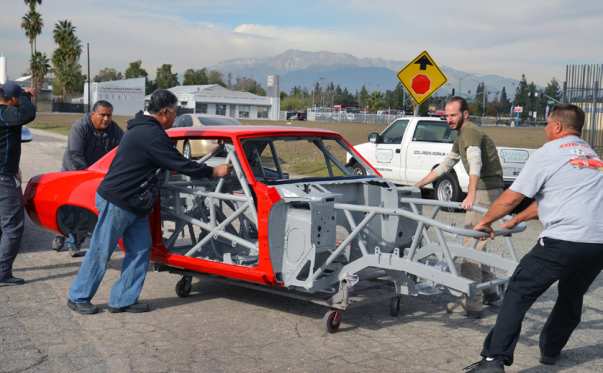
Careful! Rounsvilles’ crew help Mark get Big Red’s finished body loaded on the trailer. The key players at Rounsvilles Auto Body that worked on the Big Red project gather around. They are: (from left to right) Bret Rounsville (shop owner, who helped with prep and buffing), Mike Rivera (prep, sanding, and buffing), Enrique Bravo (body work), Brandon Wright (classic-car specialist: prep, sanding, and buffing), Ryan Rounsville (shop manager), and Bob Calles (painter).
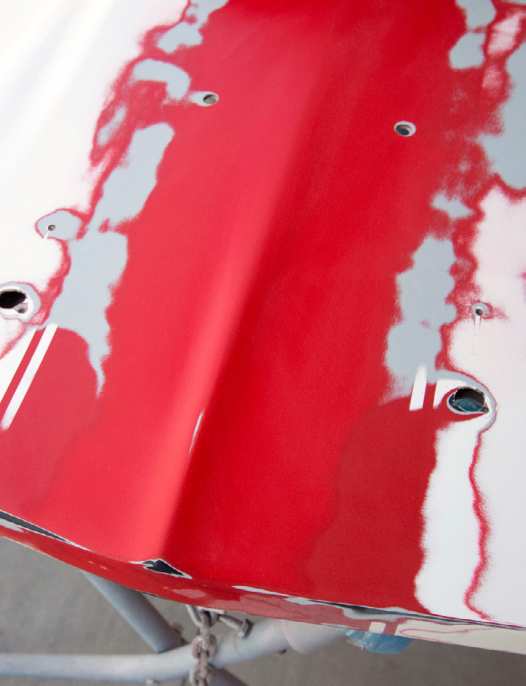
Big Red has had many coats of paint over the years. Some of the parts have been in service through many different repaints. This is the Land Speed/Top Speed hood, so which one of these layers went 204 mph at the Texas Mile and which one went 232 mph at Mojave? Each layer would have its own story to tell. Brandon is sanding the aero plug that fits over the front of the hood. Since the stripes add an extra layer of paint, Brandon is going to sand and feather edge along the stripes. Otherwise, the edges of stripes might show through the new paint.
Big Red has had many coats of paint over the years. Some of the parts have been in service through many different repaints. This is the Land Speed/Top Speed hood, so which one of these layers went 204 mph at the Texas Mile and which one went 232 mph at Mojave? Each layer would have its own story to tell. Brandon is sanding the aero plug that fits over the front of the hood. Since the stripes add an extra layer of paint, Brandon is going to sand and feather edge along the stripes. Otherwise, the edges of stripes might show through the new paint.
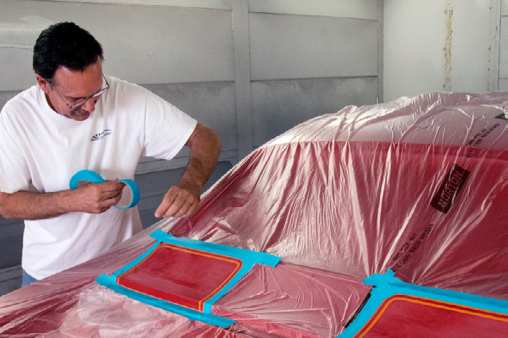
With the masking around the stripes finished, it’s time for some white basecoat to be applied over the red. Bob and Bret removed the masking and, viola! The Z/28 stripes are on and the body is ready for clearcoat
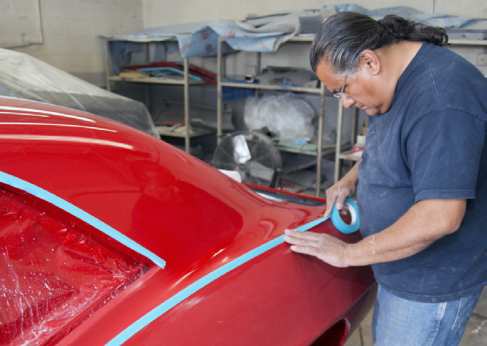
The primed fenders were installed on the body so the position of the hood stripes could be aligned properly to the header panel. The hood (shown next to the car) had properly laid-out Z/28 stripes, so it was used as a guide to transfer the stripe dimensions to the cowl panel and header panel. Once the stripes are transferred and laid out on the panels, that old hood will be sanded and repainted to match the new Ultra Red.
Bob sprayed clearcoat on one hood and two trunk lids. One trunklid is for the large aero spoiler and the other (just inside the photo frame on the right) is for use with the smaller factory-height rear spoiler. There are plenty of other body parts and backup body parts to paint. For Rounsvilles, this job was the equivalent of painting three Camaros.
After the clearcoat had dried, the next step in the process was to turn the orange-peeled surface into a smooth, glassy finish. It’s a race car, but it’s Big Red, so it will look like a show car before it’s considered finished.
Bret started the wet-sanding process, previously known as “color sanding,” back when wet sanding single-stage paints left behind a slurry of the color from the paint being sanded. Bret uses a sanding pad wrapped with 1,000 Nikken paper. The next round of wet sanding is done with 1,500-grit paper, then followed by 2,000 grit. Bret and Bob wet sanded the car from top to bottom, being extra careful on all the peaks and edges to make sure they didn’t sand through the clear. If the white Z/28 stripes weren’t high build, and Bob applied a good coat of clear, the wet-sanding process will knock down the edges and leave a smooth surface.
Just like wrenches for a mechanic, 3M Perfect-It™ Rubbing Compound and Machine Polish are tools of the body-shop trade. Rubbing compound is used for restoring paint finish after wet sanding, and the polish is used on the top coat to remove swirl marks left over from the polishing process.
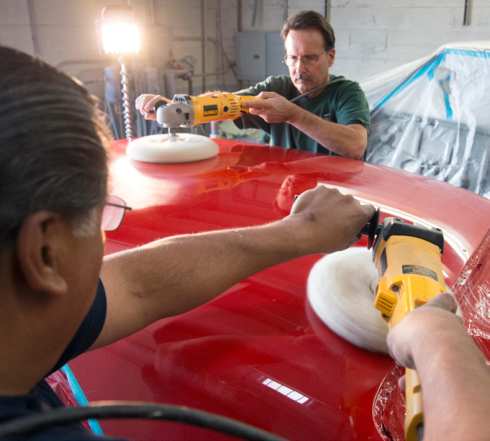
With the wet sanding finished, Bob and Bret tag team the car
with buffers and 3M Perfect-It™ EX rubbing compound and wool pads. These guys know it’s important to keep the correct amount of rubbing compound on the pad. Buffing with a dry pad can burn the paint past the point of being repairable. Without proper training, buffing is best left to the professionals.
When Bob started buffing close to the peak of the panel, he taped it so he didn’t burn through the clear on the edge. It doesn’t take much to buff through the clearcoat and into the basecoat. Bob taped the edges and peaks to ensure his buffer didn’t burn through them while buffing the surrounding flatter surfaces. Later, he will remove the tape and polish the peaks, edges, and valleys (shown with the louvered area on the quarter panel) with extreme care. After the buffing is done, then the guys will do the whole process over again, but with 3M EX Perfect-It™ Machine Polish and a foam pad (not shown).