BRAKES
Big Red has gone through a few different brake systems over the years. In the beginning, Bill Osborne installed JFZ brakes, because it was one of the few performance brake companies on the market for the extreme applications required by Big Red. In 2004, with help from Hot Rod magazine, Baer Brakes, and a few other companies, Big Red was pulled out of the museum in Laughlin, Nevada, to be restored. Since then, Baer Brakes has been the primary brake brand, with the exception of using small, lightweight Wilwood calipers in extremely salty conditions at Bonneville and dirty conditions at El Mirage dry lakes between 2013 and 2015. This was done because Dave knew Big Red only needed a little bit of braking because there’s little traction on the surface of the salt and dirt; most of the slowing down was accomplished by the parachutes. All other racing since 2004 has been handled by Baer. In July 2015, Dave saw value in using Baer for all applications, so small Baer SS4 calipers were fitted for use on salt and dirt.
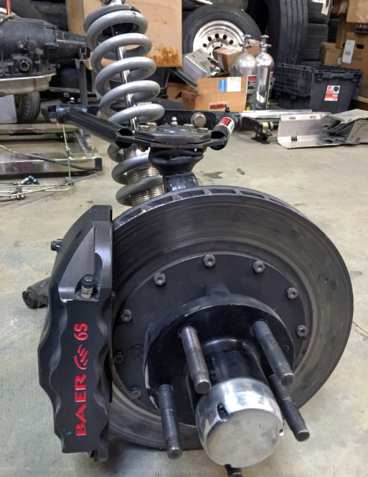
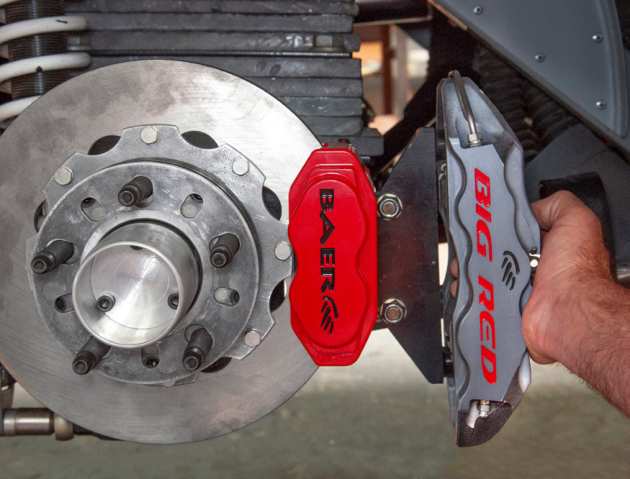
For this rebuild, the team decided to upgrade to Baer R-Spec floating rotors and 6R calipers (from 6S). When the time came to have the new calipers made, Rick Elam from Baer asked if RJ wanted to use its custom machined logo services. He supplied options, and the four best choices were put up to a vote on social media. Fans selected the silver powdercoat and a combination of black and red logos.
The Extreme series 6R calipers use a radial caliper mount, which they bolt on with two studs on the same plane as the rotor. Standard production cars use a “floating” caliper that self-aligns and slides back and forth during braking. The 6R is lighter than the 6S version. The weight reduction is from the removal of material across the opening of the caliper. The R version has a quick-access retaining clip, so the pads are easy to swap in the pits without needing to remove the caliper to do so. The R-Spec floating rotors also are a new upgrade for Big Red. They are lighter and allow for expansion and contraction as the rotor temperature changes
during use. The guys get the different brake pads with different compounds (for different applications) labeled and boxed as sets so they can be swapped at the track and saved for a later date when needed.
The old brake-pedal assembly put the master-cylinder reservoirs under the dash. They worked adequately, but their placement was service unfriendly. To fill them, the guys had to run a hose under the dash and pump it into the master-cylinder reservoirs. The rebuild was the best time to update the master cylinders and come up with a service-friendly solution. A new brake fluid reservoir mount was welded to the cage bar behind the dashboard, and an access panel hole was cut in the center of the top of the dash where the original Camaro speaker grille was located.
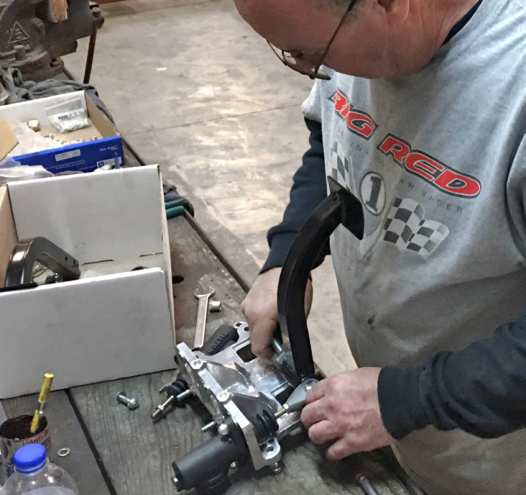
Tim assembled the Tilton brake-and clutch-pedal assembly out of the car, then he installed it on the already-fabricated brackets under the dash. Next, he installed the clutch and brake master-cylinder reservoir assembly to the bracket behind the dash and started running the hoses to the masters. The reservoir hoses were attached and safety-wired to the master cylinder caps. Cliff plumbed the brake hard lines. The photo was taken through the side of the cowl. For reference, the area where the master cylinders are located is below where the original wiper motor linkage was located. Now there’s a removable service panel on the side to gain
access to the back of the firewall. The new Baer 6R calipers have different radial-mount blocks than the ones for the old Baer 6S calipers. This required making new axle-mounted flange brackets. Tim already made a new caliper bracket out of cardboard and transferred the shape to a 3/8-inch cold rolled steel plate. The radiuses are uniform around the mounting holes, and the edges were clean ground. The whole bracket was built old-school style. It was cut out on a bandsaw and drilled with a drill press. It took more time than using a water jet table, but it goes to prove something this nice can be built without high-dollar equipment. Comparing the old black bracket to the new bracket, you clearly can see that the old bracket is much shorter. Dave used his lathe to machine some bushings for spacing the brake caliper radial-mount off of the new caliper bracket. Dave already had shimmed it with washers to get a rough idea of the required bushing size. Stacking a bunch of washers is not a good long-term option. A single bushing is a much better choice. The new caliper bracket is mocked in place on the rear differential housing. The caliper’s radial mount is bolted to Tim’s new axle-mounted flange bracket. Once the floating hub assembly is mounted, the caliper will slide over the two radial-mount caliper studs.
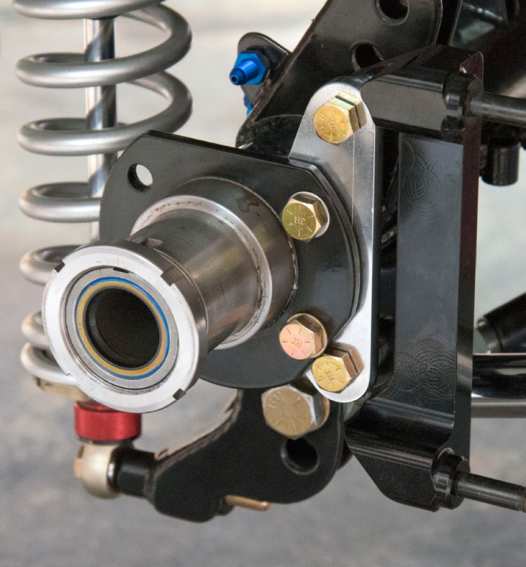
Big Red always has run a Speedway Engineering full-floater rear differential since Bill Osborne started building the car in 1987. Tim assembles the floater hubs before installing them on the housing ends. One of the benefits of running a full-floater rear differential is the large-diameter axle bearings (shown in the center of the hub).
Before installing the floater housing ends, Tim safety wired the rotor to the floater hub. Everything that isn’t a regularly serviced part is safety wired so it can’t come loose until the team wants to remove it. Bolts that are holding parts that get hot on a regular basis are susceptible to heat cycling and could come loose during the process. Brake and header bolts are good examples of candidates for safety wire. The new swap from 6S to the new 6R forged 2618 aluminum monoblock calipers and R-Spec rotors saved a few pounds per corner. It doesn’t equate to that much on a heavy car like Big Red, but every bit helps. The biggest benefit now will be the ability to swap brake pads at the track without having to remove the calipers to do so. Finally, Dave installed a new speaker grille section on the top of the dash to cover the clutch and brake master-cylinder reservoirs. With the windshield installed, the Dzus fasterners are popped open and the grille slides forward slightly to clear the dash pad cover so it can be removed completely.